
Combing wool
As promised, here's a quick description on combing wool for hand spinning. In my opinion, combed top makes the BEST prepared fiber for handspinning. It's lump-free, dirt-free, and provides a good arm work out--never mind the fun in spinning something that you prepared.
First, I lightly tease apart the wool locks. I usually comb merino or merino crosses, so the wool is often fine. I find that a staple length greater or equal to 3" is best for combing. Here's a picture of a merino x corriedale fleece. It's just beautiful.

There are various tools for combing wool ranging from the mini combs such as those made by Louet to the weapon-like English combs in which one comb remains stationary. I have a set of 5-pitch English combs from Indigo Hound. They are indeed quite the weapons and one must be very careful with one's hands!
Anyway, I usually lash on about 15 grams of wool to the stationary comb. Obviously this picture is not of the same wool, but the goal is the same.

Note the position of the stationary comb, it is pointing straight up. When lashing the wool to the comb, I try to place the staples just into the first row of teeth. Of course, some wool will get past the first row, but the further back in the rows you get, the harder it will be to comb. I also try to load the staples all in the same orientation, that is, with all the tips facing out. After the wool is in place, I rotate the comb 90 degrees and lock it in place. I also place a large card board box directly beneath the stationary comb to catch the dirt that falls out of the wool.
With the other comb in hand, I begin to swing at the staples, holding the moving comb with the tines perpendicular to those of the stationary comb, trying to only catch the very tips of the wool. I repeat this combing process until almost all the fibers have transferred to the moving comb. The short fibers and second cuts, as well as debris such as vegetable matter will stay stuck on the stationary comb.

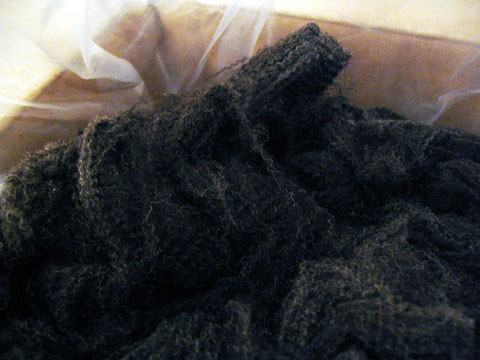
I then transfer the wool back to the stationary comb by swinging the moving comb sideways, still holding it so that the tines are perpendicular to the stationary comb (i.e. pointing down). When doing this, I, again, try to catch most the fibers on the first row of tines. Some more of the shorter fibers will be caught in the moving comb. Here, you see the wool after two passes through the combs. The fibers are nicely aligned but the wool still needs some more combing to get rid of the stubborn lock structure. I find that four passes with the combs are sufficient to obtain a nice and smooth top.
So, after I'm satisfied with the uniformity of the combed wool, I use a diz to attenuate and remove the wool from the stationary comb. Indigo Hound includes a simple and useful diz made of PVC. Basically, I gather the combed wool with my hand and pull lightly to make a tip which I will then pass through the hole of the diz. I use a crochet hook for this. I then begin to pull on this tip with one hand while holding the diz with the other. I gently push the diz towards the stationary comb as I pull the wool top away from it.

This way I can get quite a long and continuous piece of roving. I keep pulling the wool out through the diz until some debris starts showing up in the top. This means it's time to stop.
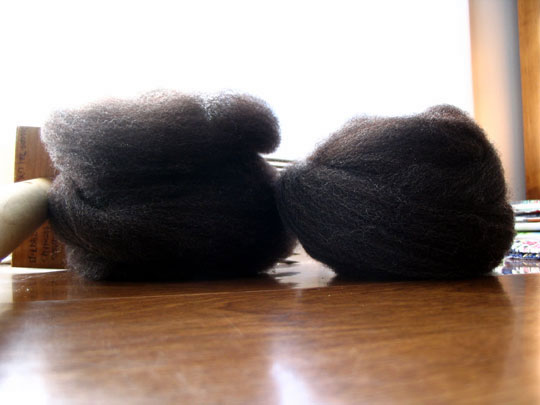
That's it, a nice, fluffy, smooth, and pretty top! I generally get ~1-2 grams of waste from 15 grams of starting material.

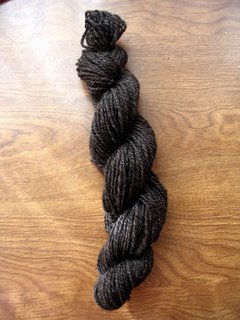
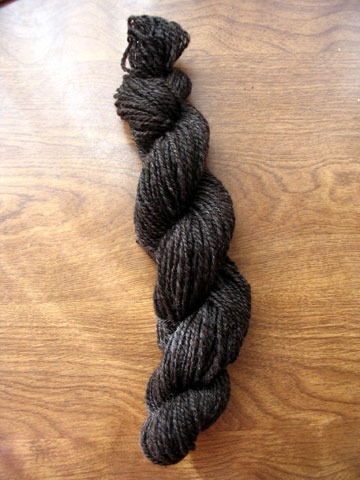
Here's a picture of the spun up wool top from that beautiful fleece.
First, I lightly tease apart the wool locks. I usually comb merino or merino crosses, so the wool is often fine. I find that a staple length greater or equal to 3" is best for combing. Here's a picture of a merino x corriedale fleece. It's just beautiful.
There are various tools for combing wool ranging from the mini combs such as those made by Louet to the weapon-like English combs in which one comb remains stationary. I have a set of 5-pitch English combs from Indigo Hound. They are indeed quite the weapons and one must be very careful with one's hands!
Anyway, I usually lash on about 15 grams of wool to the stationary comb. Obviously this picture is not of the same wool, but the goal is the same.
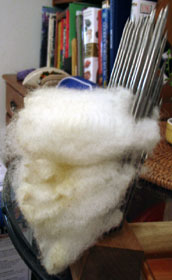
Note the position of the stationary comb, it is pointing straight up. When lashing the wool to the comb, I try to place the staples just into the first row of teeth. Of course, some wool will get past the first row, but the further back in the rows you get, the harder it will be to comb. I also try to load the staples all in the same orientation, that is, with all the tips facing out. After the wool is in place, I rotate the comb 90 degrees and lock it in place. I also place a large card board box directly beneath the stationary comb to catch the dirt that falls out of the wool.
With the other comb in hand, I begin to swing at the staples, holding the moving comb with the tines perpendicular to those of the stationary comb, trying to only catch the very tips of the wool. I repeat this combing process until almost all the fibers have transferred to the moving comb. The short fibers and second cuts, as well as debris such as vegetable matter will stay stuck on the stationary comb.

I then transfer the wool back to the stationary comb by swinging the moving comb sideways, still holding it so that the tines are perpendicular to the stationary comb (i.e. pointing down). When doing this, I, again, try to catch most the fibers on the first row of tines. Some more of the shorter fibers will be caught in the moving comb. Here, you see the wool after two passes through the combs. The fibers are nicely aligned but the wool still needs some more combing to get rid of the stubborn lock structure. I find that four passes with the combs are sufficient to obtain a nice and smooth top.
So, after I'm satisfied with the uniformity of the combed wool, I use a diz to attenuate and remove the wool from the stationary comb. Indigo Hound includes a simple and useful diz made of PVC. Basically, I gather the combed wool with my hand and pull lightly to make a tip which I will then pass through the hole of the diz. I use a crochet hook for this. I then begin to pull on this tip with one hand while holding the diz with the other. I gently push the diz towards the stationary comb as I pull the wool top away from it.

This way I can get quite a long and continuous piece of roving. I keep pulling the wool out through the diz until some debris starts showing up in the top. This means it's time to stop.
That's it, a nice, fluffy, smooth, and pretty top! I generally get ~1-2 grams of waste from 15 grams of starting material.
Here's a picture of the spun up wool top from that beautiful fleece.
posted by Ana at 2/26/2006 11:39:00 PM
![]()


2 Comments:
nice :)
I must say that this is the best photo-tutorial on combing that I've seen to date. Thanks! I've just bought English combs myself, and have been combing my heart out ever since.
Lisa
Post a Comment
<< Home